DateCue Guide
Everything you need to set up date-based automations for your Shopify products. From creating your first metafield to running workflows on a schedule.
Getting started
DateCue works by watching product metafield dates and triggering actions when those dates arrive. Before you create a workflow, you need a date metafield on your products. Here's how to set everything up from scratch.
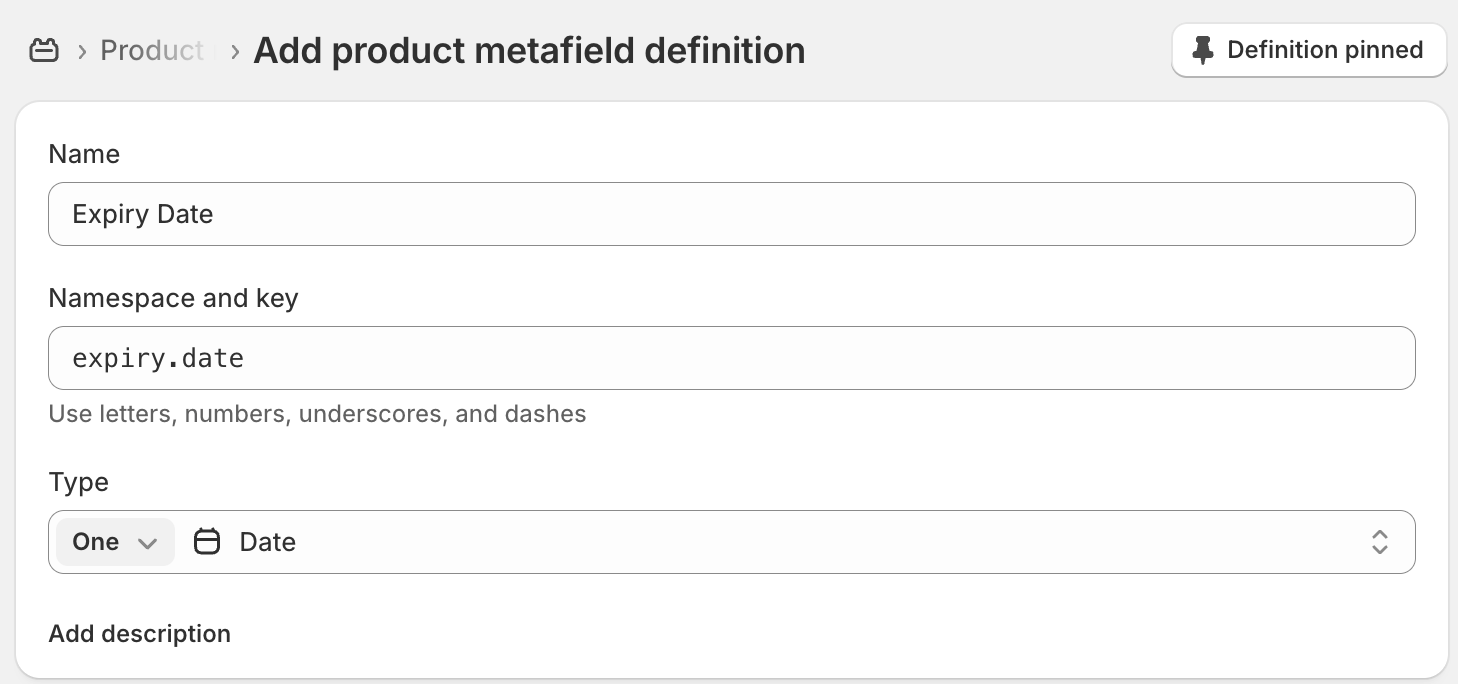
Step 1 — Create a date metafield definition
Metafield definitions tell Shopify what custom fields your products can have. You only need to do this once per field type.
DateCue supports two metafield types. Date fields trigger at midnight (00:00) on the selected day — useful for expiry dates or any automation where the exact time doesn't matter. Date and time fields trigger at the exact time you set — useful for product launches or time-sensitive actions.
- In your Shopify admin, go to Settings → Custom data → Products
- Click Add definition
- Give it a name (e.g. "Expiry Date") and a key (e.g.
expiry_date) - Set the type to Date or Date and time
- Click Save
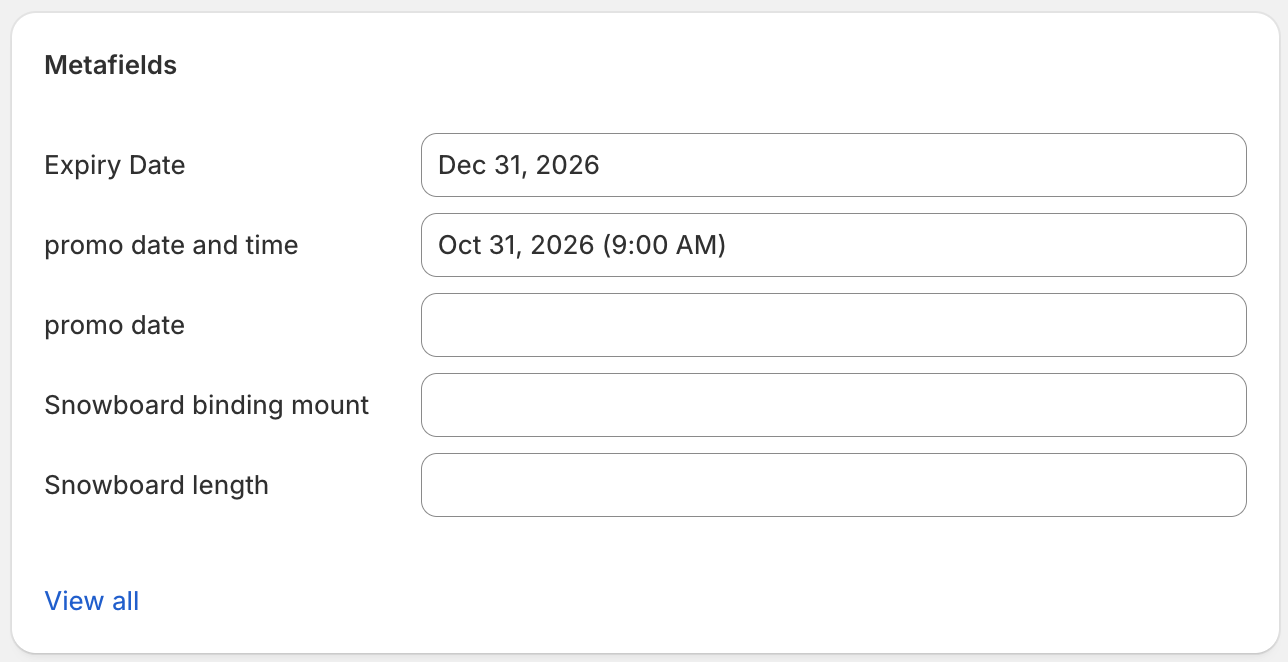
Step 2 — Apply the metafield to your products
- Go to Products and open any product
- Scroll down to the Metafields section
- Set a value for your new date field
- Save the product
Repeat for any products you want DateCue to track. You can bulk-edit metafields using Shopify's bulk editor if you have many products.
Step 3 — Create a workflow in DateCue
- Open DateCue from your Shopify admin
- Click Create workflow
- Select the metafield you created (e.g.
custom.expiry_date) - Set your trigger — On the date, or X days before or after
- Choose an action: change status, add/remove tag, send email, or fire a webhook
- Optionally add filters to limit which products the workflow applies to
- Save the workflow

Step 4 — Verify it's working
After saving your workflow, DateCue will sync your products in the background. If you've just added or changed a metafield date, click Sync Now on the dashboard to pick up the changes immediately.
- Open DateCue from the left panel in your Shopify admin
- The dashboard shows your tracked products count and upcoming scheduled executions
- After the date passes, go to Logs to confirm the action ran successfully

Note: DateCue checks for due actions every minute. Your workflow will run within a minute of the scheduled date and time.
Use cases
Here are the most common ways merchants use DateCue.
Auto-archive products on their expiry date
Perfect for food, beverage, supplements, or cosmetics stores with best-before dates.
- Create a Date metafield called "Expiry Date" (
custom.expiry_date) - Set the expiry date on each relevant product
- Create a workflow: trigger On the date, action Change status → Archived
Products will be automatically archived when their expiry date arrives — no manual checking required.
Launch products on a specific date and time
Great for limited drops, preorders, or seasonal collections.
- Create a Date and time metafield called "Launch Date" (
custom.launch_date) - Set products to Draft status in Shopify
- Set the launch date and time on each product
- Create a workflow: trigger On the date, action Change status → Active
Products will go live automatically at the exact time you set — no staying up at midnight.
Rotate seasonal collections
Useful for stores with products that go in and out of season.
- Create two metafields: "Season Start" and "Season End"
- Create a workflow for Season Start: action Change status → Active
- Create a second workflow for Season End: action Change status → Draft
Each product will activate and deactivate automatically based on its season dates.
Send staff alerts before a date arrives
Useful for getting ahead of expiry dates, contract renewals, or any date that needs human attention.
- Create a date metafield for the relevant event
- Create a workflow: trigger 7 days before the date, action Send email alert
- Enter the email addresses of the staff who should be notified
Your team will receive an email listing the product name and date — giving them time to act before it's too late.
Using filters
Filters let you limit which products a workflow applies to. You can combine multiple filters on a single workflow.
Status filter
Only run the workflow on products with a specific Shopify status (Active, Draft, Archived, or Unlisted). For example, only archive products that are currently Active.
Include tag filter
Only run the workflow on products that have all of the specified tags. Useful for targeting a specific product range.
Exclude tag filter
Skip products that have any of the specified tags. Useful for protecting certain products from being affected by a workflow — for example, excluding products tagged no-auto-archive.
Note: If you add a tag to a product that excludes it from a workflow, any pending scheduled actions for that product will be cancelled on the next sync.
Actions reference
Change product status
Sets the product's Shopify status to Active, Draft, Archived, or Unlisted. This is the most common action for automating product launches and expiry.
Add or remove a tag
Adds or removes a single tag from the product. Useful for managing collections, filters, or internal tracking systems that rely on tags.
Send email alert
Sends an email to one or more addresses. You can customise the subject and body, and use placeholders like {{productTitle}} and {{metafieldValue}} in the message. If no recipients are specified, the email goes to your store's default notification addresses.
Send webhook (Pro plan)
Sends an HTTP POST request to a URL of your choice when the date arrives. The payload includes the product ID, title, handle, metafield value, and workflow name. Use this to trigger actions in external systems like ERPs, Zapier, or custom integrations.